The Soaked Bean

Seeking Nourishment, Finding Traditions

  • About
  • Recipes
  • Library
  • Events

No Bones About It: Chicken Bone Broth

October 17, 2014 By Lauren

chicken-21

For me, bone broth is it.

While some find wellness through the straw of their smoothie or at the bottom of their green glass of spirulina, I find that I never feel more nourished, more well, in all senses of the word, than when the contents of my bowl, my mug are of the golden, gelatinous, mineral-rich kind.

Now, I’m not talking about the stock found in tetra-packs or the bouillon cube wrapped in foil, I’m talking about broth, in all its simmering glory,  home-rendered from nothing but bones, water, vinegar, heat and time.

When I have a jar of bone broth in my fridge, as funny as it sounds, I feel safe.  Safe because I know that a nourishing meal is within reach with even the most modest contents of fridge. Some carrots, an old celeriac, garlic, onions: voila! a velvety carrot soup.  Some rice and lentils with nary a vegetable to be found:  cooked in bone broth the flavor becomes complex and comforting, as savory as a all-day-stewed tomato-sauce.

There are a few, basic rules for making broth, however they do differ depending on what bones you use.  I made a broth with the bones from last week’s Dimanche Roast, so I’ll be detailing the basics for a chicken broth this week.

Gellin’ like…the Gelatin-Component in Bone Broth

Bone broth is good-for-you in so many ways.  It’s rich in many valuable minerals like calcium, magnesium, phosphorus, silicon and sulfur in a form that is easily digestible and absorbed. It contains the anti-inflammatory amino acid arginine which helps to inhibit infections caused by cold and flu viruses.  And, for me most importantly of all, it’s a rare source of gelatin, a substance that attracts digestive juices and supports proper digestion.

Gella-what?  Remember that lime-green, wobbly mass shaped like an angel-food cake and specked with the half-moons of canned mandarin oranges?  No?  Wrong generation?  Ok, remember that plastic shot glass filled with candy-apple red that goes down in one schluuuurp?  That’s gelatin!  (And sugar, and artificial colors and flavors and, in some cases, vodka).

Gelatin is such a revolutionary component of bone broth because it is a water-loving, or hydrophillic, compound like most other foods in their raw state.  However, most foods we eat are cooked and have become in this cooking process hydrophobic, or water-resistant.  When we think of our digestive system–the flow of our digestive juices–it’s not hard to imagine why a diet high in cooked foods could be taxing.  This is the basis for the raw foodist ideology.  Even so, a diet based on raw foods does not support all climates,  lifestyles, nor bodily compositions.  Enter gelatin.

The gelatin content of bone broth is not altered during cooking, nor is the substance rendered hydrophobic in the process.  It’s easy to see why a vegetable soup cooked in bone broth is so profound.  All those cooked carrots and potatoes and onions digested within a water-loving compound; that’s some soup for the soul, indeed.

Chicken Bone Broth

For me, the greatest priority in broth making is getting your broth to gel.  This means that, when cooled, your broth should have the consistency of, well, JELL-O.  This can be ensured by paying particular heed to steps #1 and #5.

#1.  Use cartilaginous bones.

Collagen, which is found in cartilaginous bones like the joints, neck, head and feet, renders gelatin.  For chicken broth, I always use 2 chicken feet in addition to the other bones.  You can find chicken feet at your local butcher, or you can ask your local chicken farmer to bring you some.  They freeze well.

#2.  Use bones with some meat on them.

This will not affect the gelatin content of your broth, but will increase its flavor immensely.  I reserve the meat on the wings for my broth.

#3.  Add vegetable scraps (if you have them) or even whole vegetables.

Bone broth is a great way to make use of kitchen “waste”–onion skins, garlic skins, ends of carrots, potato peelings.  If you’re making broth weekly, you can store these in the fridge.  Otherwise, freeze them for later use.

Whole cloves of garlic, halved onions, halved potatoes all add flavor to your broth.

#4.  Fill a large stockpot with cold water and add the bones and feet and 1/4 cup apple cider vinegar.  Let sit for an hour.

The vinegar helps to draw out the minerals from the bones.

#5. Turn heat on medium-high.  When the liquid starts to roll, turn down heat immediately to low. At this point, there will be a good amount of foam on the surface of your broth.  Skim, skim, skim.

This foam contains surface impurities and will negatively affect the flavor of your broth.

#6.  Simmer, simmer, simmer.

I usually cook my chicken broth for 12 hours.  Some say the proper amount of time for chicken broth is between 4 and 6 hours, but I’ve found that my broth never gels in this time.  Experiment!  And please post your findings here!

This Spring, I recently discovered the wonder-powers of the slow-cooker for broth making.  It eliminates all of the leaving-my-stove-on-for-too-long anxiety and allows you to experiment with various cooking times with ease.

A pressure cooker will render a gelatin-rich broth, but many argue that it denatures the proteins in food.  I’ve never used one in broth making, and am not well-versed its mechanism.

#7.  Toss in a few sprigs of fresh parsley during the last 15 minutes of your simmer.

This will add minerals to your broth and complexity to its flavor.

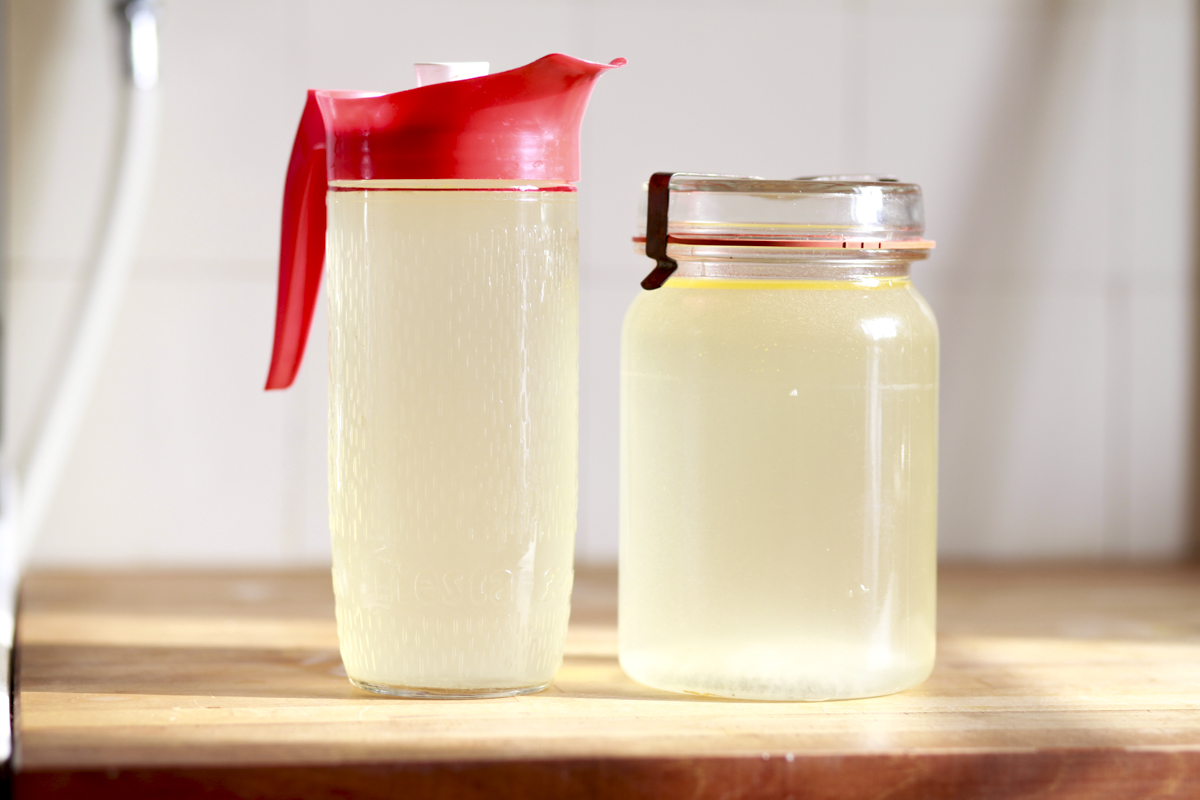
#8.  Let cool in pot, then strain into sterilized glass jars.

These keep in the fridge for 4-5 days.  A layer of fat will form at the top of your cooled broth.  This helps preserve your broth and can also be used to, say, fry an onion, or cook an egg.

You can freeze your broth for later use.  Frozen broth will last indefinitely, it would seem.  I’ve experimented with freezing in glass jars, but have had inconsistent results–with the glass shattering more often than not.  I now use plastic bags, letting the broth cool completely before transferring it.

Filed Under: Chicken, Kitchen Essentials, Recipes Tagged With: bonebroth, chicken, traditionalfoods, wapf

Free-Form Ferments

September 22, 2014 By Lauren

ferments!

Eight years ago, I moved away from home, the first move in what was to become a long series of geographic fluidity: four-years in New York, a summer in Eastern Maine, a semester in Prague, some months in Sweden and more in Greece, an internship in Tuscany, one season in New Hampshire and one in California, a school-year in Vancouver, BC, and, now, most recently, a one-way-ticket to Geneva.  I’ve lived in a log cabin on a blueberry field, a dorm room opposite Washington Square Park, the bed of a pick-up truck, the loft of a garage; always in furnished rooms or places belonging to other people, sublets for six months, six weeks; always in transition, a temporary stay.

My affection for food, particularly the simmering pot, the wilting onion, the soaking bean, the home-cooked, has grown during these years even during stays in places without proper kitchens.  It’s true that I’ve more often been blessed with plenty—Laura’s kitchen in Oakland with shelves of Le Creuset, a spacious kitchen all to myself on Kitchener Street, my mom’s incredibly well-equipped and appointed kitchen—and for this I am forever grateful, however I feel especially indebted to the make-shift kitchens for teaching me that plenty can be achieved with, say, an induction plate and six-inches of counter-space or a camp-stove.

Making pickles the traditional way—without vinegar, using lactic-fermentation—is one of my favorite home-cooked, or more rightly home-rendered food traditions because it requires so little to produce something so stellar.  No stove?  No oven?  No fridge?  No problem!   In fact, you don’t even really need a kitchen.  All it takes to turn the season’s vegetables from perishable foodstuffs to (beneficial) bacteria-brimming, good-for-your-gut-health preserves is a sealable vessel and some salt.

veg bird'seyetorshi

In his definitive text on the subject, The Art of Fermentation, lactic-fermentation guru Sandor Katz advocates for the free-form ferment: unbound by the restrictions of a “traditional” recipe, promoting experimentation and creativity while utilizing the resources at hand.  The simplicity and safety of lactic-fermentation has been obscured by, what Katz terms as, our “War on Bacteria”.   In fact, this War—the chlorinated water, the pasteurized dairy, the antibiotic—has created conditions where the dietary incorporation of living lactic bacteria is of tantamount importance to our health.

With nearly 80% of our immune function based in our gut, the maintenance of a healthy microbiome–the collective genomes of the microbes, including bacteria, that live inside of us and especially in our guts–is directly correlated to a general sense of wellbeing.  This is why there has been such a major push for probiotics within the naturopathic community.  The theory is that probiotics, which have been selected and cultured in a lab, are better able to populate our intestines than the lactic acid bacteria native to traditional foods (Katz, 26).   As cultures have been preserving foods through lactic-fermentation for centuries, and as the probiotic is relatively new in comparison (albeit with a multi-million dollar nutriceutical industry funding its research), I prefer to receive my bacterial benefits from these home-rendered traditions.

For the first time in a long time, I’m settling in a place, staying permanently, dreaming of a (flea-market-found) Le Creuset-stacked shelf of my own.   With our kitchen out-of-commission due to a fresh coat of paint, L & I celebrated this last weekend of the summer season by making pickles—a hark to transitional times and a reminder of the plenty present, ever-present in even the most make-shift conditions.

krautmaker

 Free-Form Ferments

There are two ways to ferment your vegetables.  You can either chop/grate them or ferment them whole.  I usually grate cabbage, carrots, and radishes for a kind of sauerkraut.  Otherwise, I ferment vegetables like cucumbers, cauliflower, turnips and also carrots and radishes whole, or chopped into big chunks.

#1.  Sterilize your jars with boiling water.

#2.

  1. If you are grating your vegetables, lightly salt them as you grate, pounding and squeezing them until moist. You should use about a tablespoon of salt for a 16-ounce jar.  If your veggies are too salty, simply add more veggies to the mix.
  2. Otherwise, chop into big chunks, or leave whole.

#3.

  1. Pack grated veggies into jar; do so tightly so that they’re forced below their liquid—you can add water if necessary
  2. Pack whole or chunks of veggies into jar, add whole spices (black peppercorns, cumin, coriander), whole cloves of garlic, slices of ginger, or herbs (dill, rosemary) if desired, add one tablespoon of salt to jar, fill jar with de-chlorinated* water making sure to cover vegetables completely.

* If you live in a region where your water is chlorinated, you can de-chlorinate it by letting your water sit in a jar on your counter-top for at least 30 minutes.  The chlorine evaporates and voila: de-chlorinated water.

#4.

  1. I like to use cabbage hearts or rolled cabbage leaves as a kind of seal at the top of my jars to make sure that molds and other oxygen dependent organisms can’t grow in my ferments.
  2. It can be important to seal water-brined ferments, especially since whole vegetables have a tendency to float.

cabbageseal

#5.   Seal with airtight lid and let ferment for 3-5 days. Before transferring to cooler temperature.  I let my veggies ferment on the kitchen counter, where they receive some sunlight/UV rays (which helps inhibit the growth of surface molds).  After 3-5 days, I transfer them to cool storage or the refrigerator.

#6.  You can enjoy your ferments after 3 days, or after 3 months, it depends on what fermentation flavor—new and green or old and sour (and everything in between) you enjoy most.

kraut

Notes:

  • I like to use unrefined sea salt—like Celtic sea salt—in my ferments, but kosher salt will work as well.
  • Beets are a particularly difficult vegetable to ferment.  I’ve had some success using raw beets (sliced thin with a mandolin and placed in a water-brine), but typically it’s better to cook beets before fermenting as their sugar content promotes a yeasty fermentation that produces a thick, syrupy brine.
  • Katz writes, the amount of lactic acid bacteria in a vegetable ferment follows a bell-curve: populations grow after vegetables are submerged, build to a peak, then decline at high levels of acidity (Katz, 102-103).  He suggests enjoying your ferments at various intervals to diversify your bacterial exposure.

References:
Katz, Sandor, 2012.  The Art of Fermentation. White River Junction, Vermont, Chelsea Green Publishing.

Filed Under: Ferments, Kitchen Essentials, Recipes, Sides Tagged With: condiments, howto, lactoferments, nutrition, probitics, sides, traditionalfoods, vegetables, wapf

  • « Previous Page
  • 1
  • 2
  • 3
  • 4
  • Next Page »

Copyright © 2025 · The Soaked Bean